Tuesday, 12 June, 2018 - 13:00
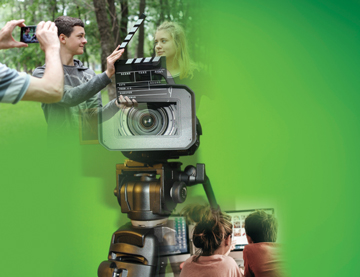
Want to capture the magic of camp on movie and incorporate it into a fun learning experience? Our guide will help your master the ins and outs of video filming, so that you and your students can hone your inner Spielberg, Scorsese and Scott with confidence.
Making a movie on camp is not only a fantastic way to capture all the excitement of camp life, but it’s also a great learning opportunity.
While on camp you can have all the fun of filming, and when you get back to the classroom you can expand the fun into an educational module about movie editing.
But what are the secrets to producing a professional video? And what are some of the common mistakes beginners make?
Our top tips for budding videographers should help you get on track – and keep you there.
Weaving your story
Your video production will be telling a story. Before you even pick up your video camera, really think about that story and how you want to portray it. Put together a basic script and think about the different shots and scenarios that will help tell your story.
An ideal way to ensure you stay on track is to create a video ‘story board,’ which is basically a series of handwritten scenes with accompanying instructions for your videographers to follow.
Add personal touches by including a human element – either in interview form, or as part of the overall story in your production.
Know your video camera
Take the time to learn about the different functions on your video camera, so when it comes time to film you will know what buttons and controls to push, pull, turn and monitor – and when.
Control the zoom
It’s very temping when you first pick up a video camera and start filming to zoom (magnify and reduce) and pan (sweep from side to side). In fact, over zealous zooming and panning is the single biggest mistake novice film makers generally make. The result is a choppy, amateurish video production that’s actually quite difficult to watch, as the eyes need to constantly adjust and focus to take in the movement.
Before you reach for your camera’s zoom control, think about why you’re doing it. Do you really need to get a closer look at your subject? Or are you just fiddling with the controls because you can? If you want to zoom and pan, do it only occasionally and for a specific purpose, ie. to get a closer look at a flower or tree. And when you pan or tilt (move the camera up or down), do it slowly and smoothly.
Think like the pros
If you want to incorporate an ‘interview’ into your movie, think outside the square. Rather than have your subject talk straight to camera, set up the interview as you see the television reporters do on the nightly news. Have one of your students, or you, interview the person, while another films.
Remember also to take some background visuals of the subject matter. For example, if you’re talking about damage to the natural environment caused by human misuse, pan the camera to a bush-walking track littered with rubbish. If you’re not able to get the background shots you want at the time, film them separately and then add them during the editing process.
Hot Tip - Always get the person being interviewed to look at the ‘reporter,’ – not the camera. This is a perfect opportunity to slowly zoom out and include the ‘interviewer’ in the shot. But remember, only occasionally and very slowly!
Short vs. long
Before you start filming in earnest, familiarise yourself with the unique characteristics of your camera’s short (wide angle) and long (telephoto) lens.
A short lens – when you zoom your video camera all the way out - will give you more depth of field, and keep objects in both the foreground and background in focus. A long lens will have less depth of field, but can be very effective if you want to focus on your foreground subject and have your background ‘blurred.’
The following experiment is a great way to teach students the different characteristics of short and long lens effects: Focus your video camera frame on a vase or candlestick sitting on a table and start filming. Now, slowly walk towards the vase while you zoom your lens out. You will notice that as you get closer, the background will come into clearer focus while the vase will gain ‘depth’.
Steady on
One of the hardest skills for novice filmmakers to master is a steady hand. It’s known in the trade as ‘shaky cam’. The best way to avoid shaky cam is to invest in a good tripod with a moveable head. This will allow you to keep your camera steady, while still giving you the flexibility to move your camera direction while you pan. As you get more confident with filming, you can ditch the tripod and go solo.
Keep your hat on
Most television sets cut off about 10% of the framed shot, so keep this in mind when you are filming. Experiment with your camcorder to determine the ideal distance required between the person’s head and the top of the frame to get the perfect amount of head room in your finished video production. Better still, take a few shots, noticing the amount of headroom you’re allowing, and then view the footage on a television set before you continue on with the rest of your filming.
On the flip side, don’t overdo the amount of headroom – a huge amount of space between your subject’s head and the top of the screen will dwarf your subject.
Light it up
If your schools budget allows it, put together a simple lighting kit for a more professional result. Your kit could contain three simple, but very effective, lights: a key light (which is placed close to the camera), a ‘fill’ light (which you set up on the other side of the camera and face towards the person or scene you are filming) and finally, a back light, which is set up behind the person or object you are filming to keep their image sharp and distinct from the rest of the background.
Get close and personal
If you want to create strong and powerful vision, get up close to your subject and really show the viewer what you want them to see. Wide angle shots not only mean your subject is diminished, but they also tend to contain a whole lot of distracting vision for the viewer – particularly if the background is busy, fast moving or noisy.
Quick Tip - The longer the lens, the more difficult it is to avoid “shaky-cam.”